Your coffee mug is the first thing you see in the morning, that is why it is important to fit your personal taste and put a smile on your face. Give a coffee mug a dash of your own personality using a porcelain marker. In this tutorial, you will learn how to transfer ready-made designs. Let’s get started!
Supplies
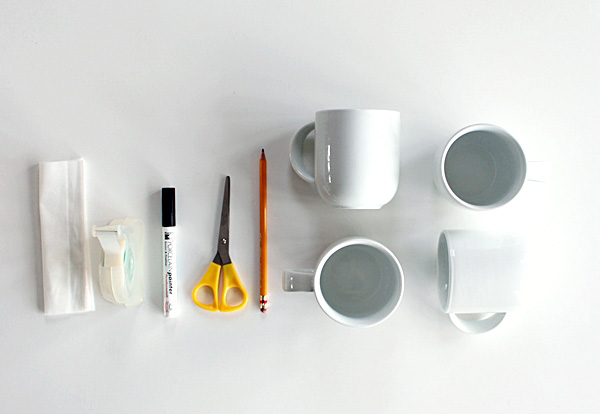
- 4 white porcelain coffee mugs.
- Black porcelain marker with fine tip (1mm).
- Soft pencil (HB or 2B).
- Scissors.
- Sticky tape.
- Wet wipes or baby wipes.
- White A4 paper and printer.
1. Transfer the Design to Your Mug
Step 1
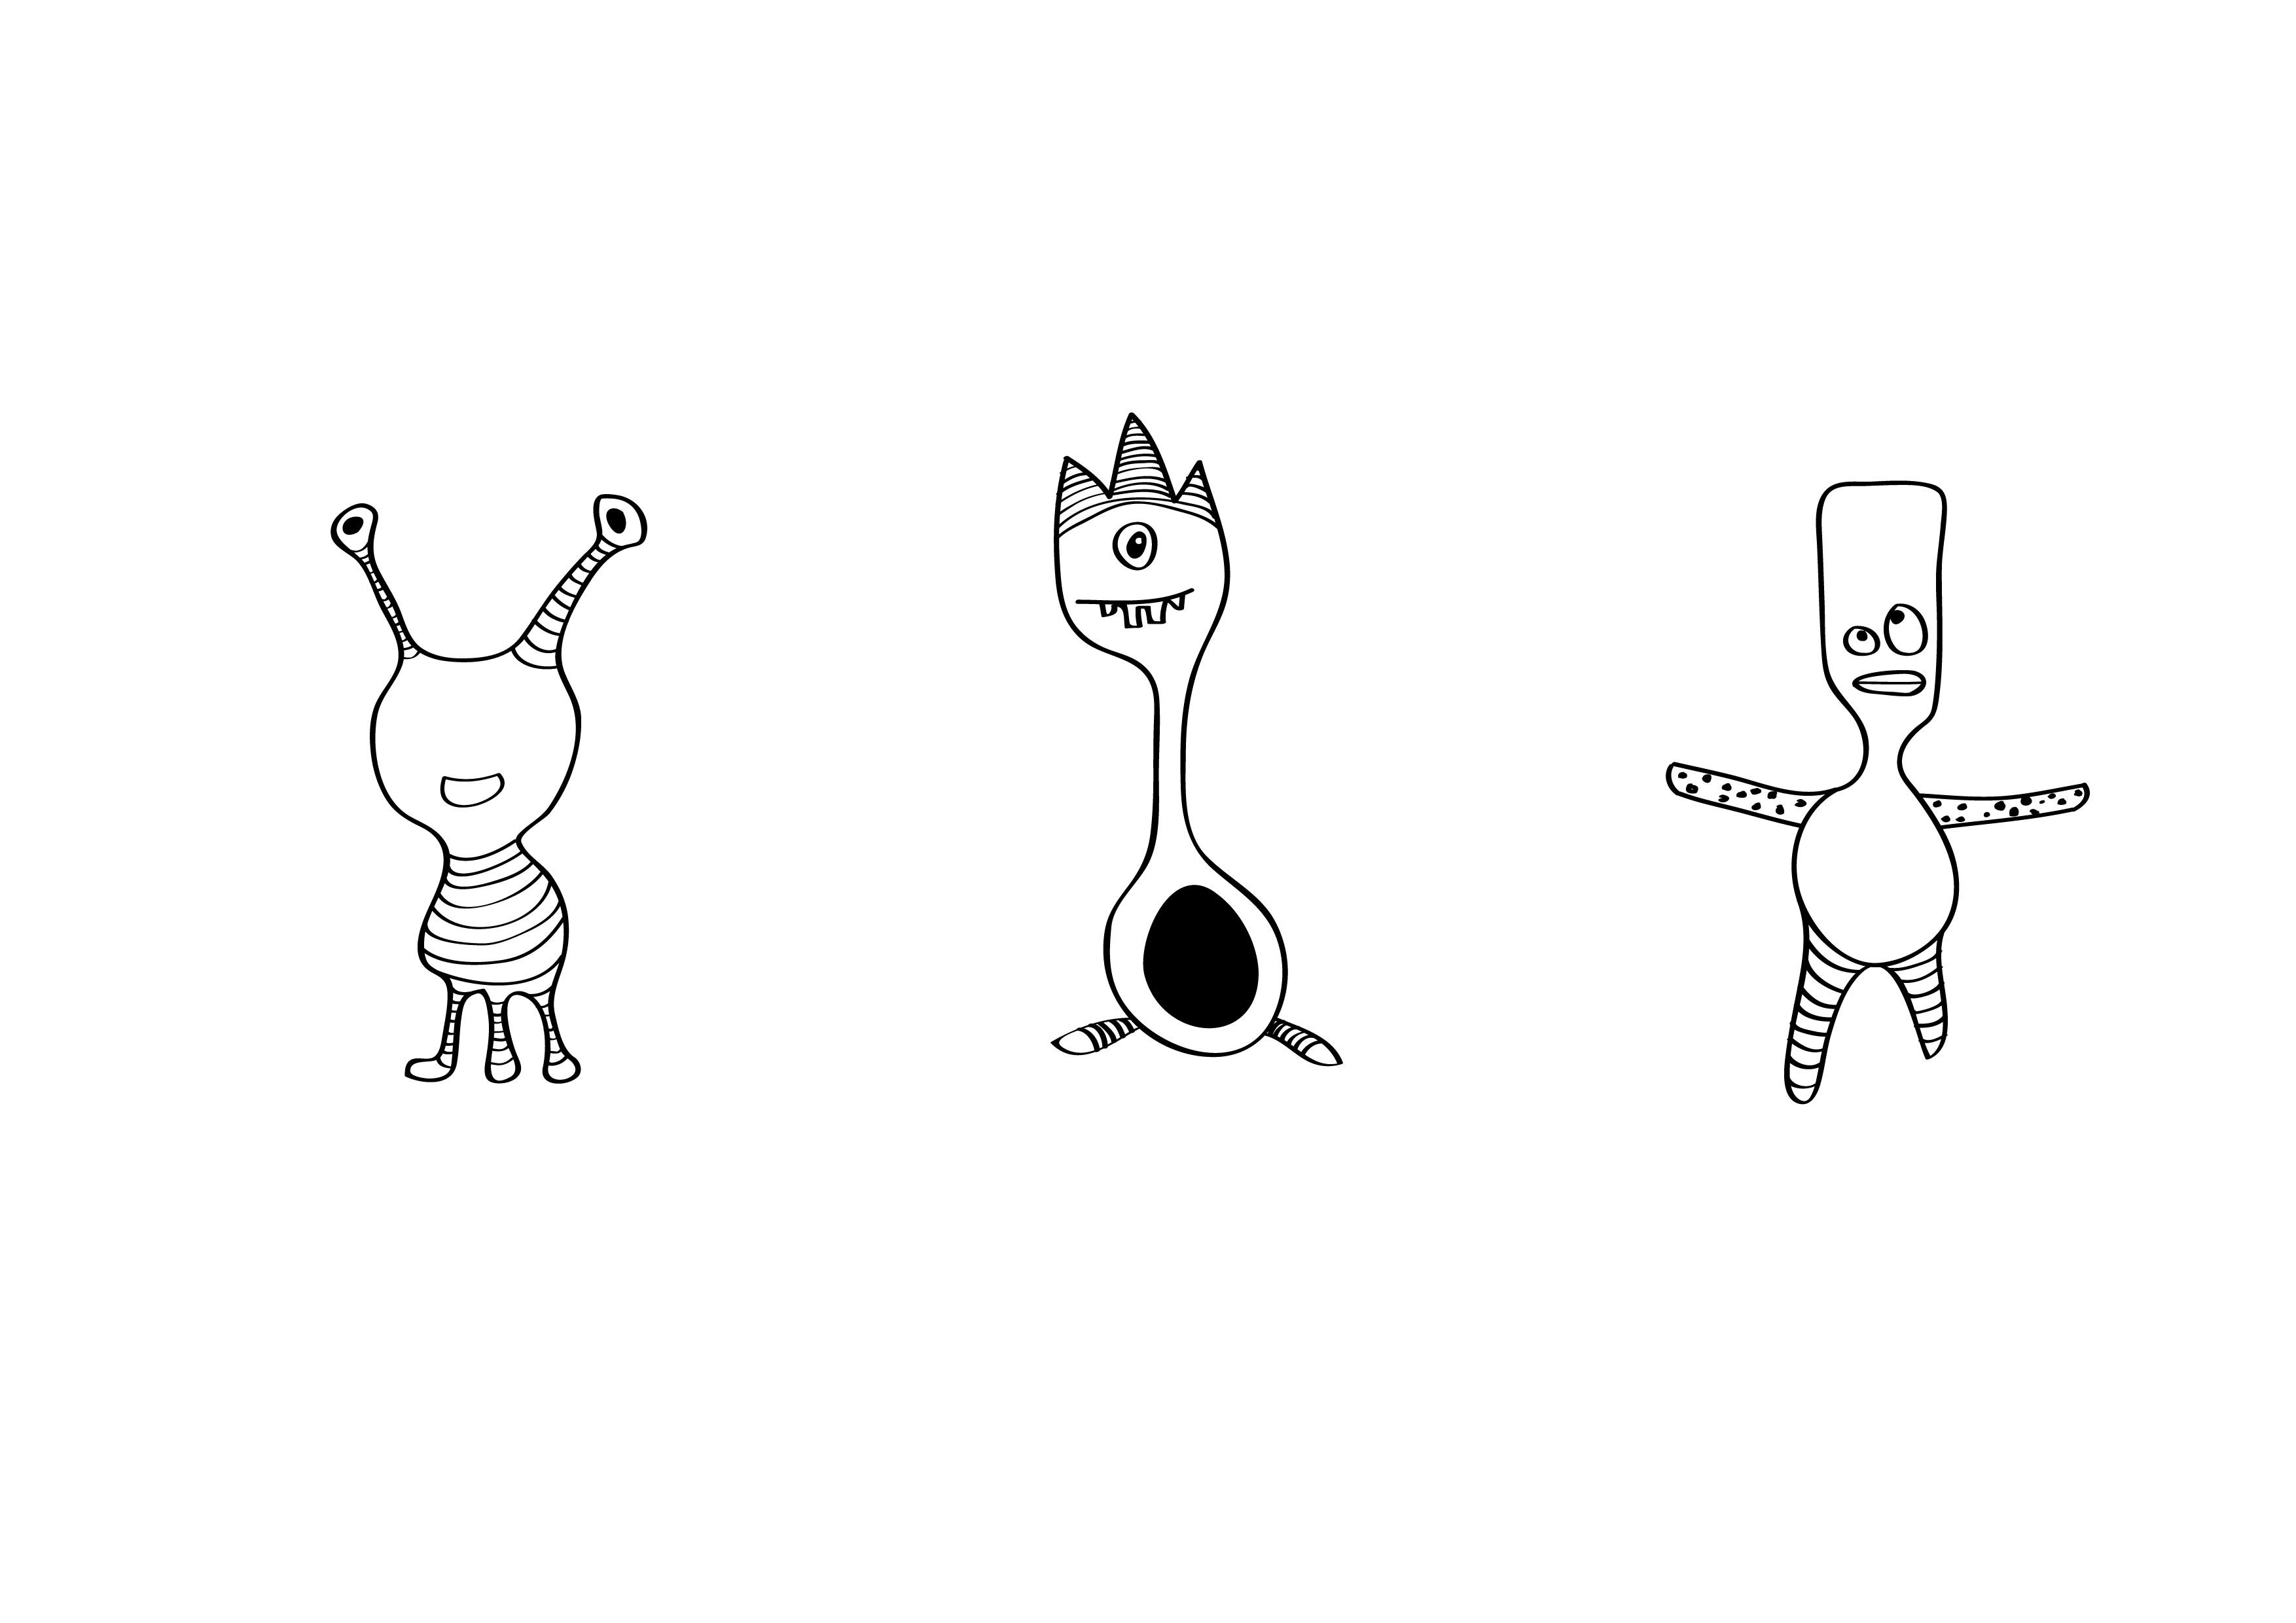
We’ve created some free printable monster patterns to decorate your coffee mug. If you print them on an A4 paper, they should be the right size to fit a typical coffee mug. For this tutorial, I printed the middle monster at double size, as I just wanted to use the head. Of course, you could also print any other design of your choice.
Step 2
Select your favorite monster and cut around it in a rough rectangular shape.
Clean your coffee mug and make sure it is free of grease and dust. Check that the design fits on your mug and place it in position.
If you want to feature just the head, calculate how much of your monster fits on the mug and trim off the lower part.
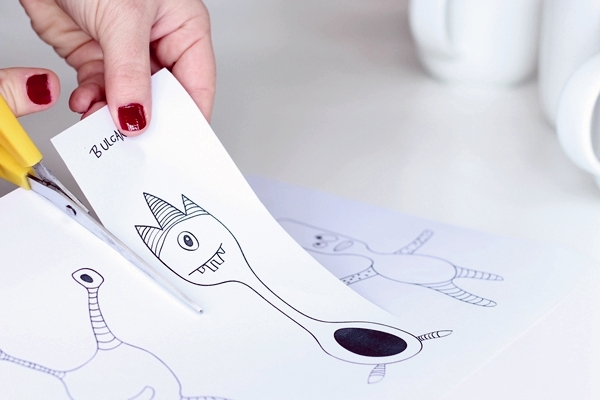
Step 3
Using a soft pencil and applying a lot of pressure, trace the basic lines of the illustration on to a plain white sheet of paper.
Step 4
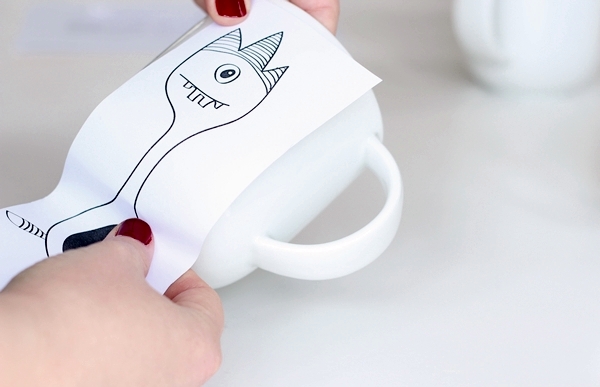
Now, turn the piece of paper with the traced monster design and attach it to the mug, with the monster facing inwards, using some sticky tape.
Please keep in mind that any design transferred with this technique will be mirrored. Therefore, if you need to transfer any text, you should print it mirrored in order to be able to read it on your mug!
Use the pencil to draw over the lines of the drawing. This will help transfer the image on to the surface of your mug. Apply a lot of pressure and make sure you don’t forget to go over every detail of the monster.
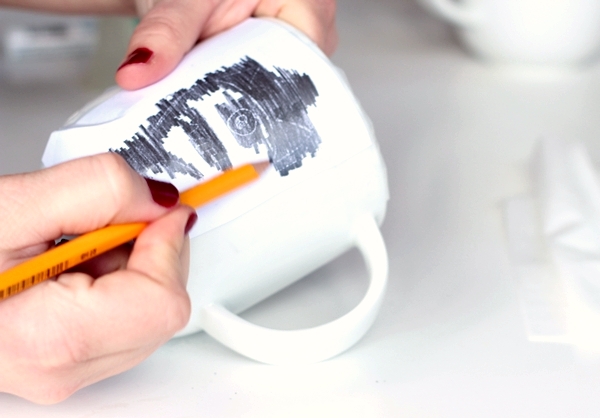
Step 5
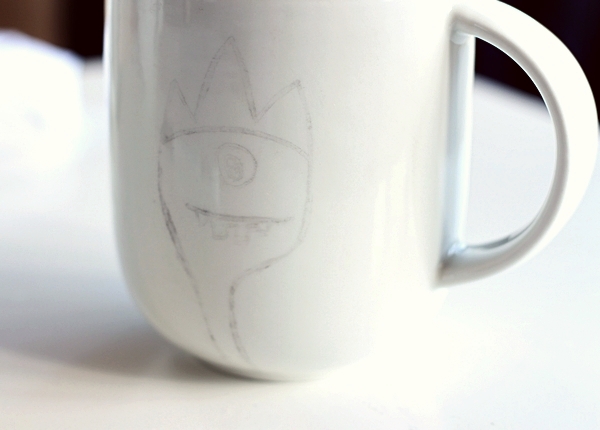
Now carefully remove the paper. You should be able to see the design of the illustration on your mug. The lines won’t be really dark, but the design will be visible enough to use it as a guide.
You can also use a porcelain marker on glass objects. If you wish to ink on glass instead of porcelain, transferring the design can be a lot easier. All you need to do is attach the printed illustration on to the inner side of your glass and you have the design there as a guide.
2. Ink the Design
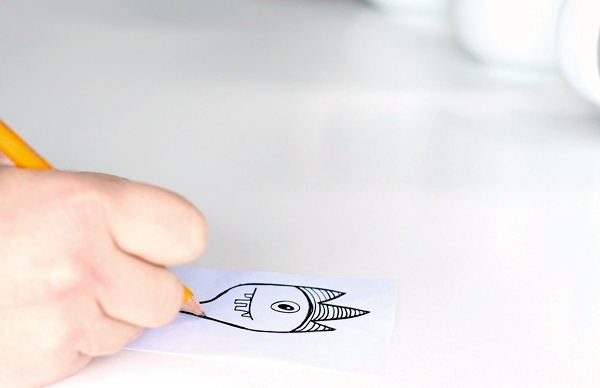
Step 1
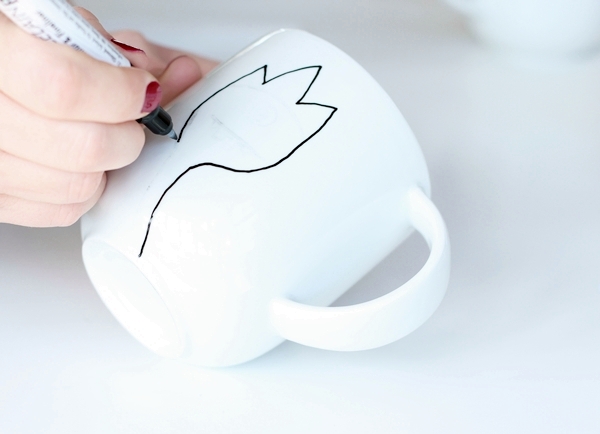
Before you start using the porcelain marker, shake the pen well and push it vertically on a piece of scrap paper, and check that the appropriate amount of paint is released.
Carefully trace over the pencil drawing with the porcelain marker to create the basic outline. If you leave the mug standing, you will notice that the marker won’t write properly when it is horizontal. Therefore, it helps to hold your mug at an angle.
Oops! Made a mistake? Don’t worry. As long as the ink is still wet, you can correct any errors by wiping them with a wet wipe. Make sure it’s dry before you proceed.
Step 2
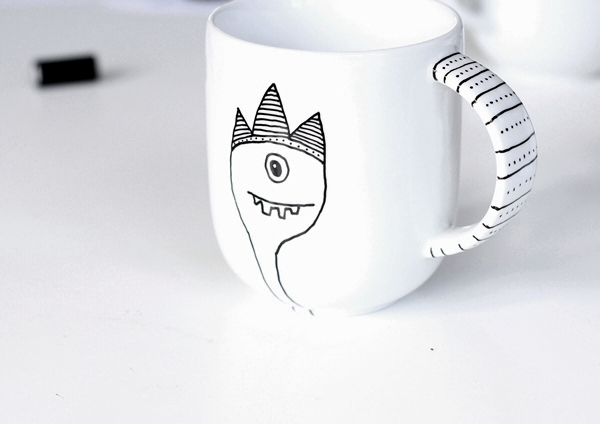
Now the basic outline is complete. You can leave it like this or add more details.
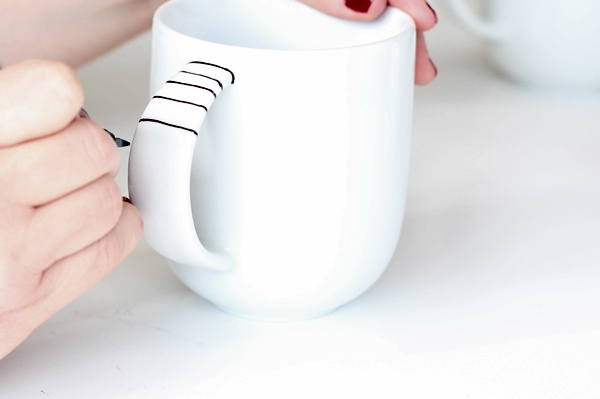
Using free-hand drawing, add some lines or dots on the monster’s head.
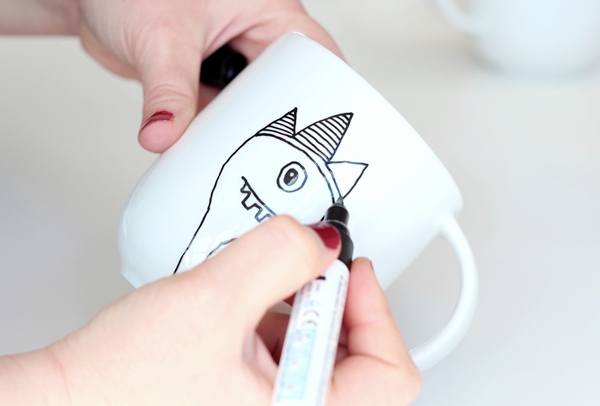
You can also decorate the handle with horizontal lines. Try adding some dots in between the lines.
3. Let Dry and Repeat
Step 1
Your new customized mug is ready. Now, all you need to do is set the ink according to the instructions written on your porcelain marker. Some of the markers just need to dry for 24 hours (although I would recommend leaving it a bit longer). Other brands of porcelain markers need to be baked for about 30 minutes in order to fix the paint. After fixing the ink, the mug is ready to use and it is dishwasher safe.
Step 2
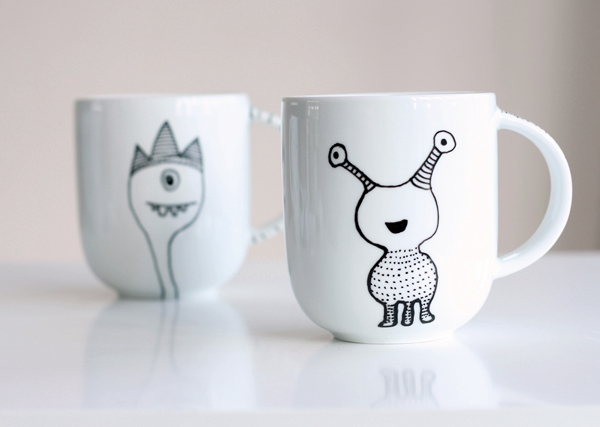
Why not make another mug for a friend? Or make a full set of six or eight mugs. Just transfer another monster design as outlined above and add some free hand details. I gave this guy striped eye stalks and a dotty design.
Enjoy Your Coffee!
Well done! You’ve now created a variety of gorgeous custom-design mugs.
In this tutorial you’ve learned how to transfer a printed design on to a coffee mug using a pencil. By customizing your mugs with a porcelain pen, you can create all sorts of copied designs.
These techniques can be applied to other porcelain objects like plates, vases or teapots and can be used to create your own personal collection. You can also create personalised gifts by adorning your mug with the name of the recipient or a witty quote. And don’t forget that you can also use porcelain markers on glass objects.
For more detailed instructios click here
Now it’s your turn to tell us about your own mug designs. Leave your comments and questions in the space below. We’d love to hear from you!